How to Enable Indexing on a Waiver
Steps to Enable Waiver Indexing
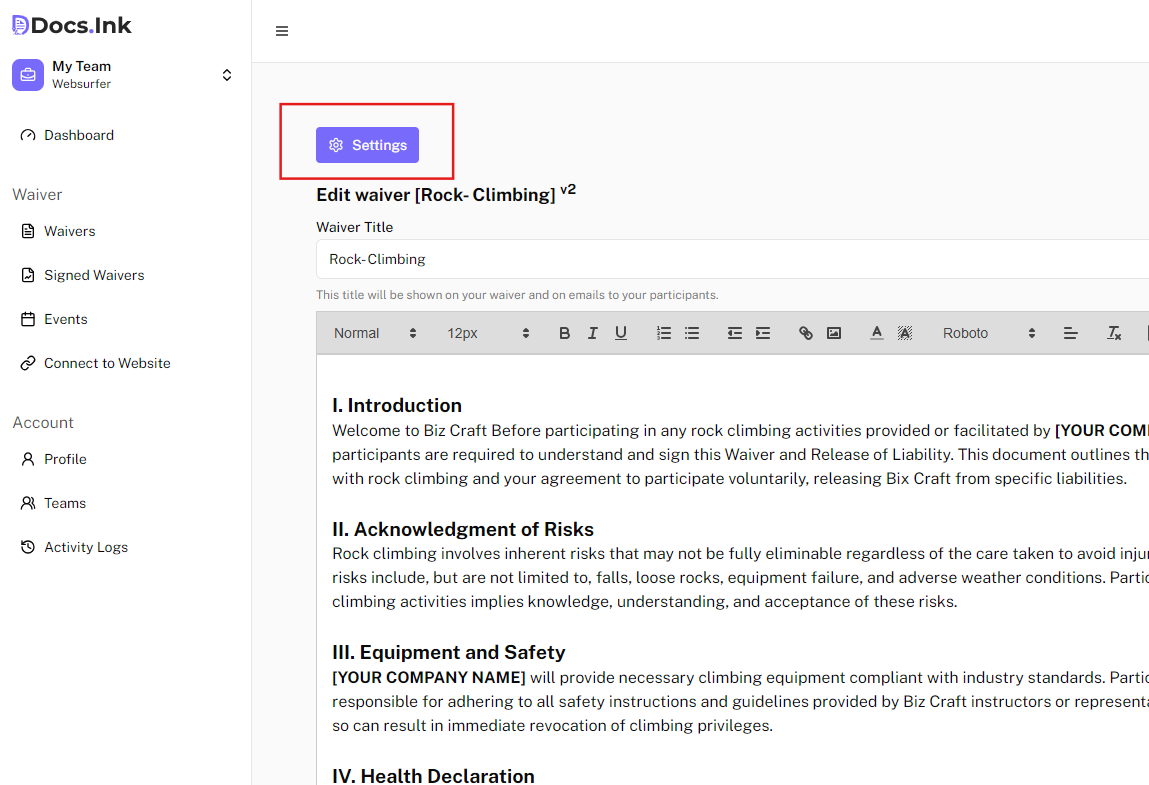
Step 1: Navigate to Waiver Settings
- Go to the Waiver Settings page for the specific waiver.
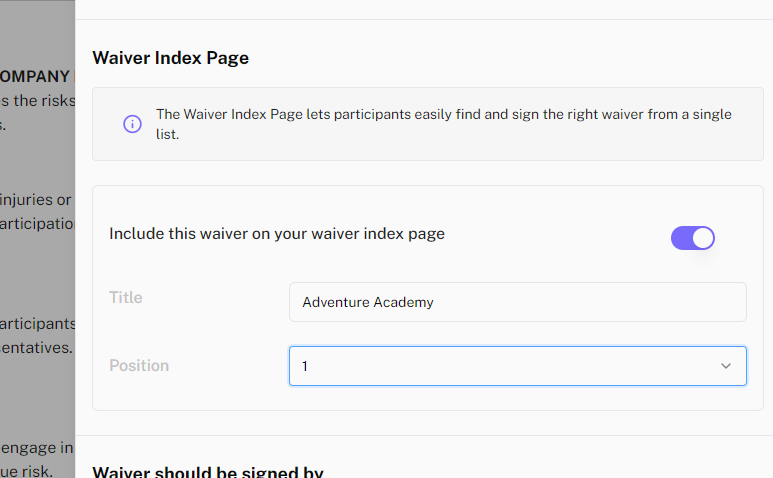
- Locate the option labeled “Include this waiver on your waiver index page.”
- Enable the toggle and update the settings. Make sure to specify the waiver title and the desired display order (position) on the index page.
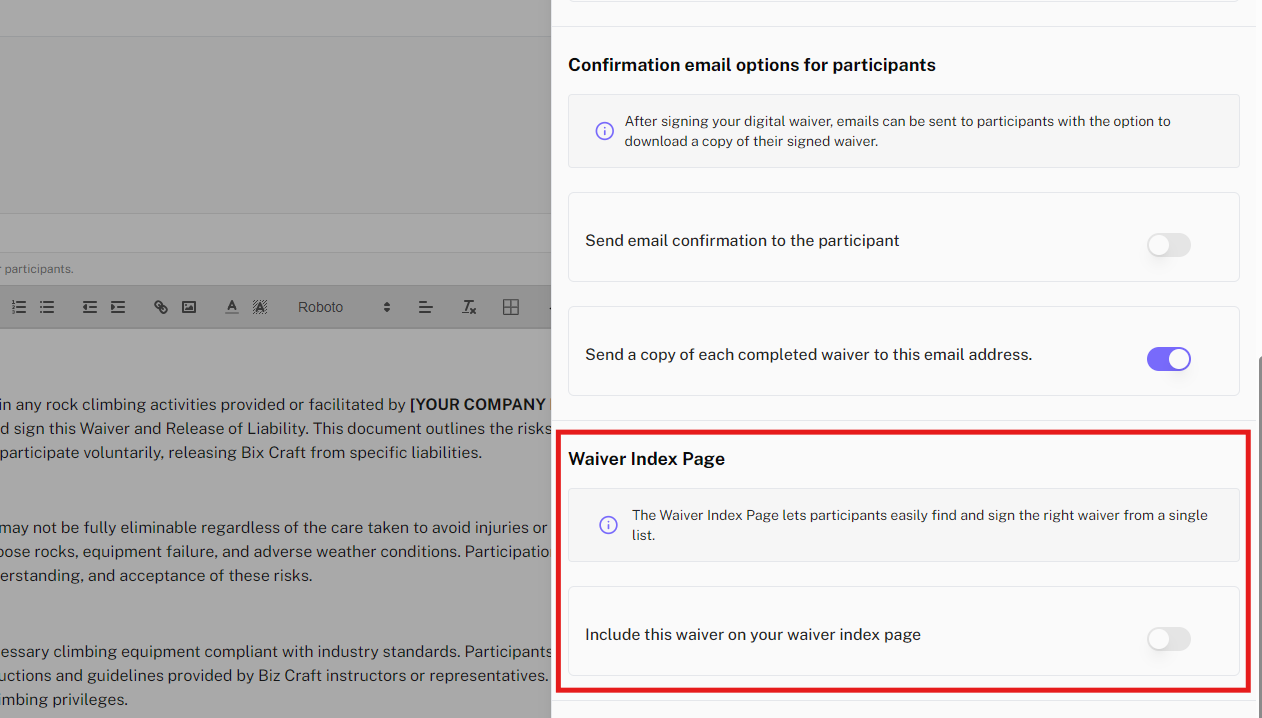
Once enabled, this waiver will appear on the Waiver Index Page.
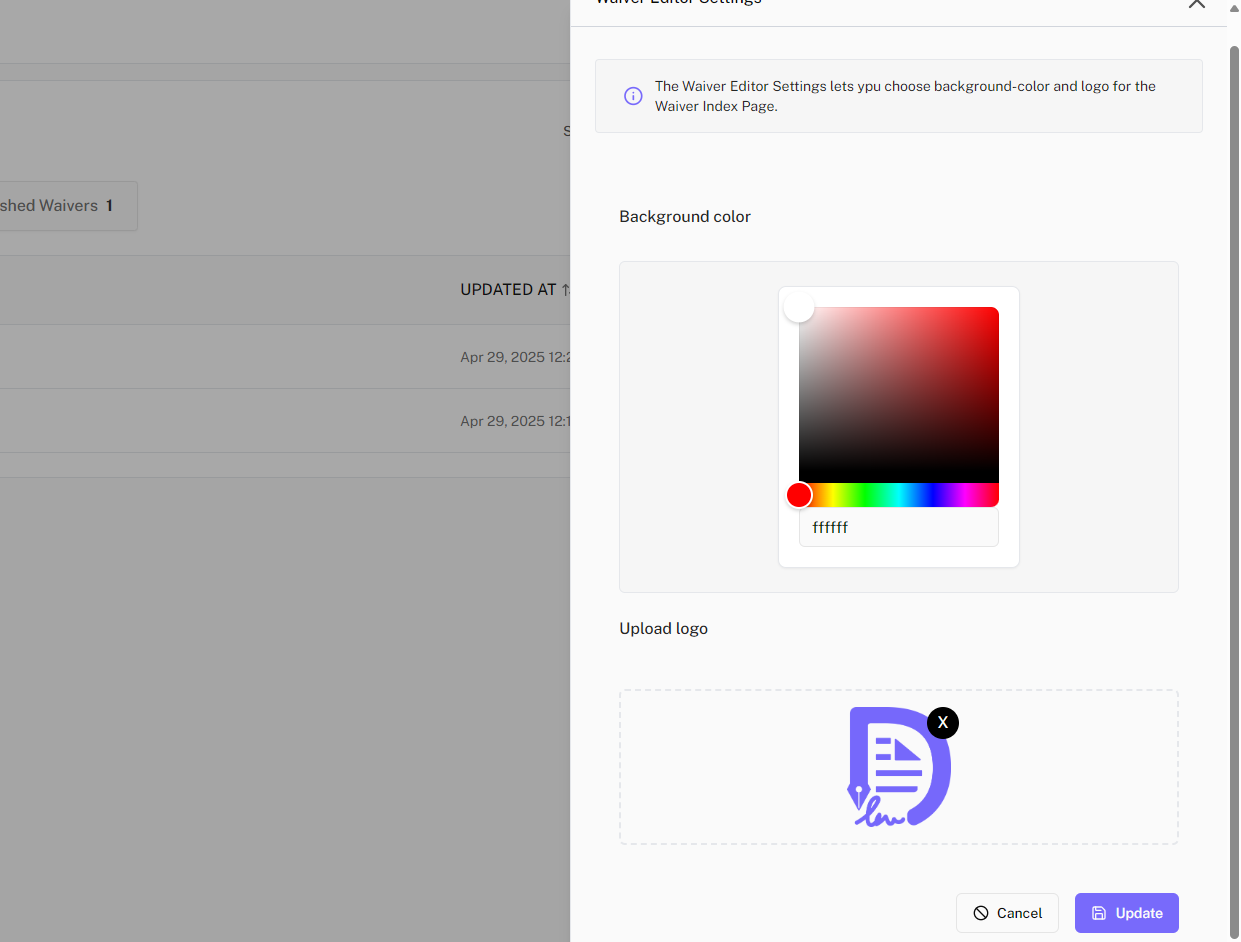
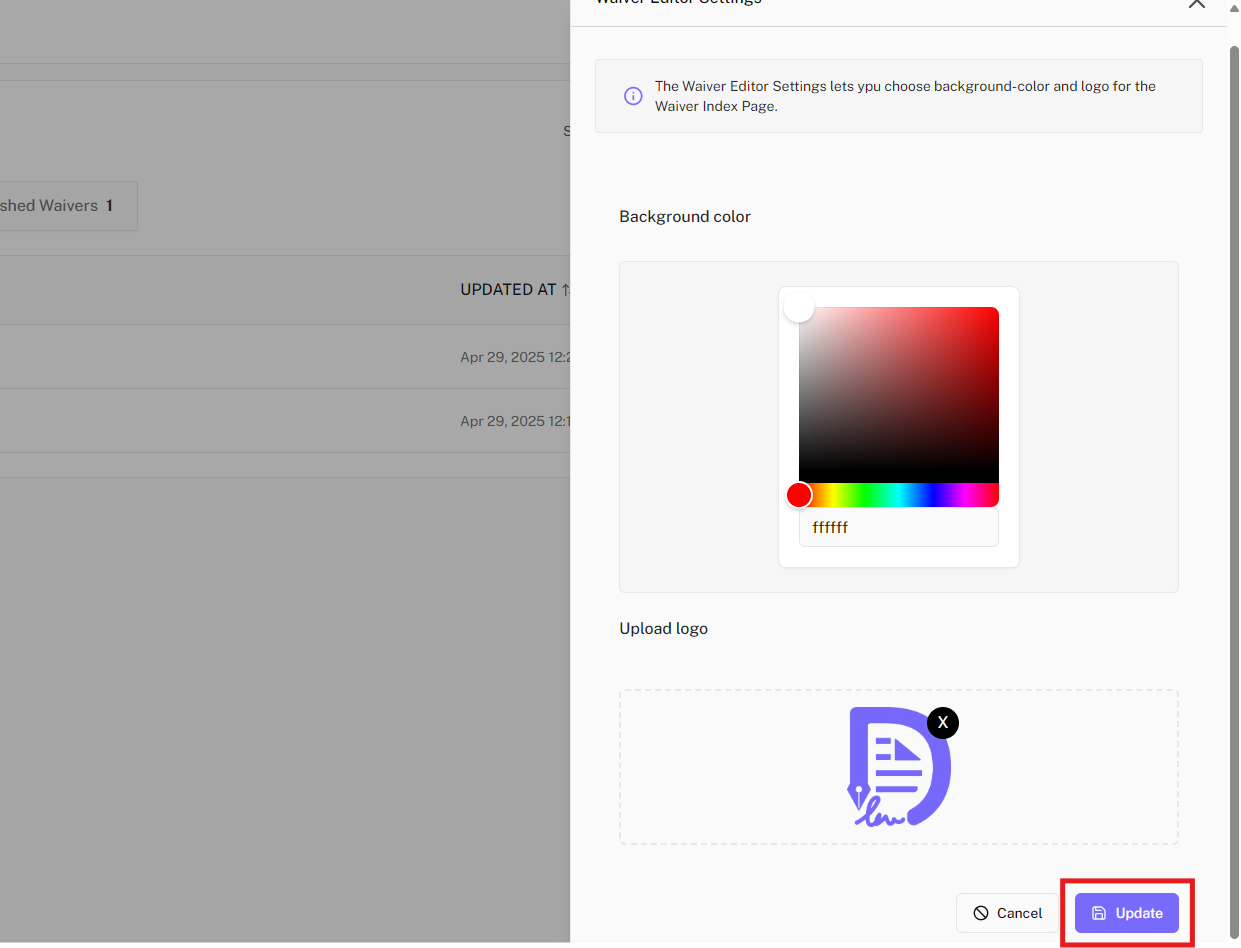
Step 2: Customize the Waiver Index Page
- Navigate to the Waiver Index Editor Settings page.
- Customize the appearance by adding a background color and uploading your logo.
- Click Save to apply your changes.
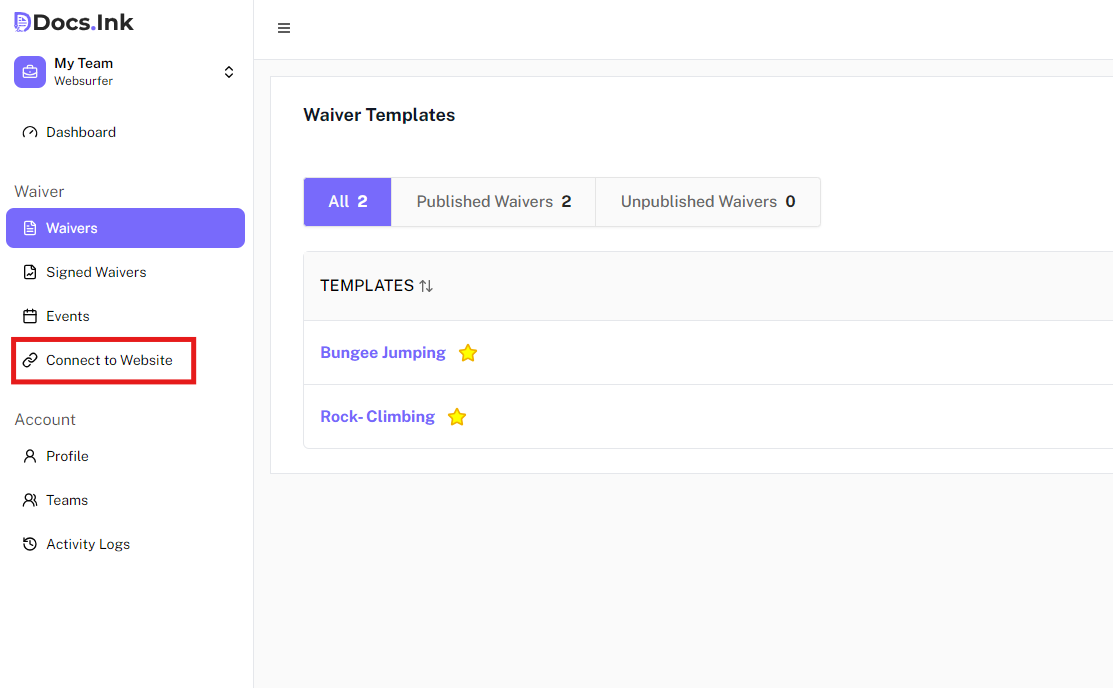
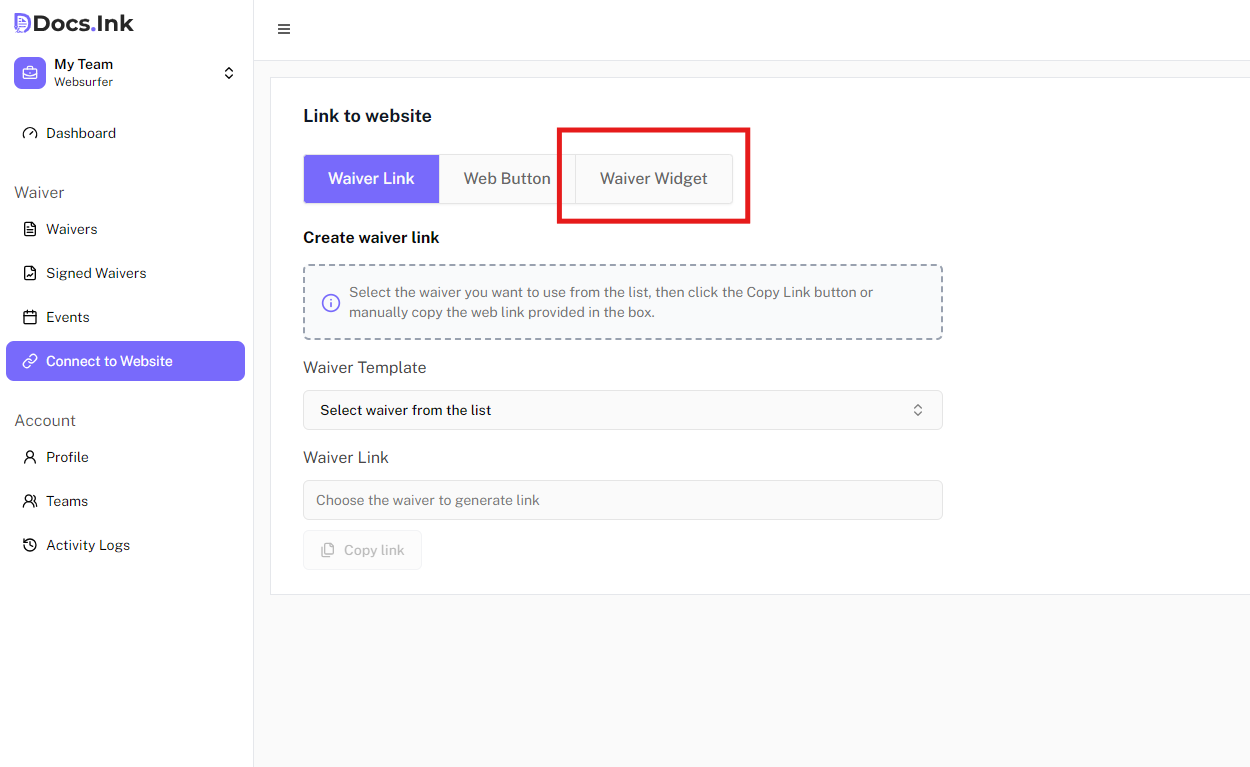
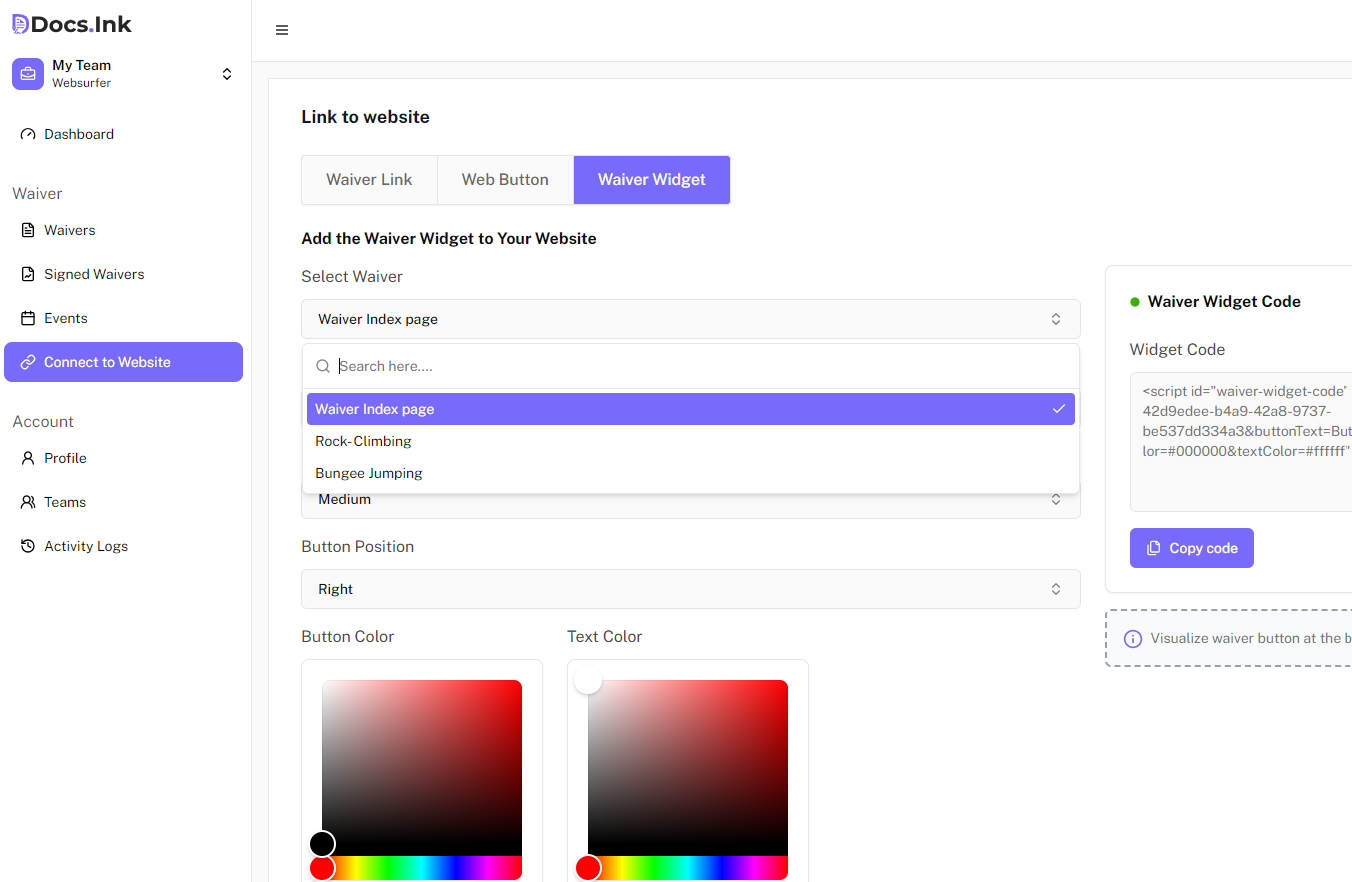
Step 3: Connect the Waiver Index to Your Website
- Go to the Connect to Website section.
- Select the Waiver Widget tab.
- In the Select Waiver dropdown, choose Waiver Index Page.
Step 4: Generate and Embed the Widget Code
Copy the automatically generated Waiver Widget code snippet.
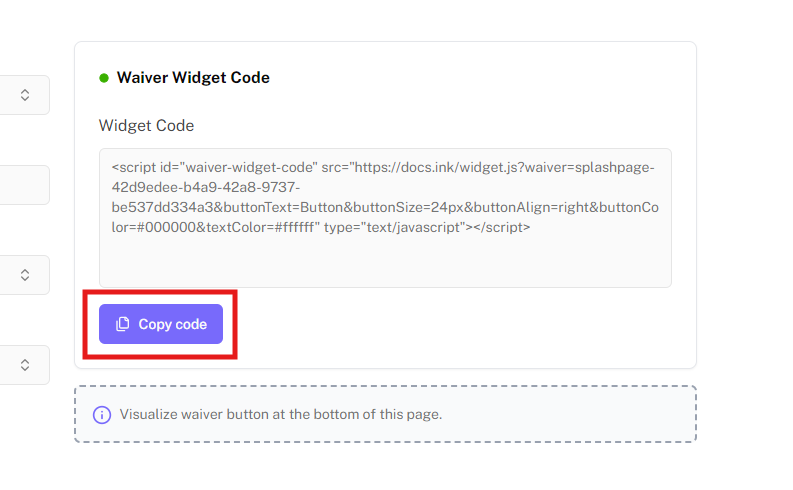
Paste the code into your website’s HTML or embedding section. Once added, the widget will be live and functional.
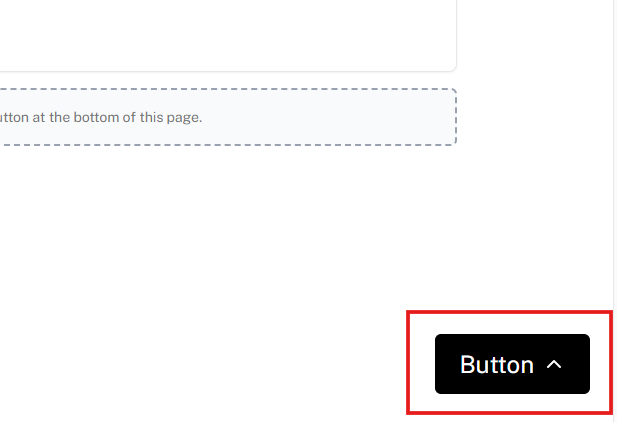
Step 5: View the Live Waiver Index Page
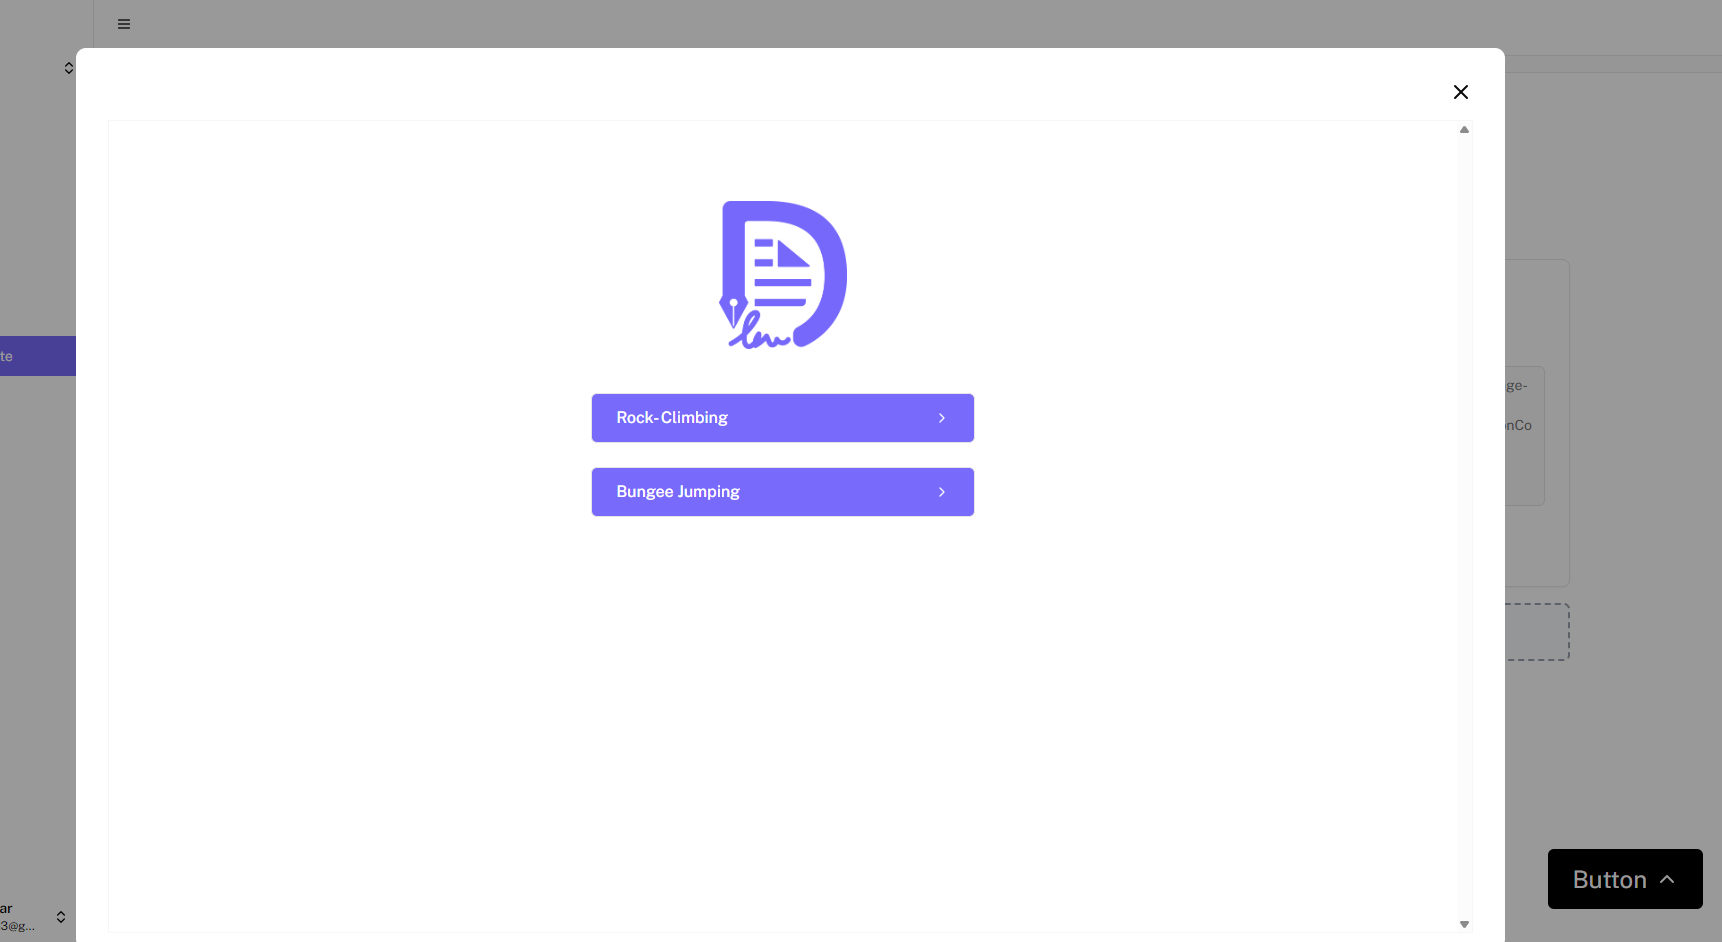
- Your configured waiver index (with the background, logo, and waivers) will now be accessible through the widget icon on your website.
- The widget displays buttons for each listed waiver. When a user clicks on a button, they will be redirected to the corresponding waiver form.
Need Help?
If you encounter any issues during registration, please contact our support team at support@docs.ink.
Last updated on